
Today’s article is the third in a series written for Piano Professional Magazine (published by EPTA) and is the final article in the series. This technique article was featured in their recent winter edition. It focuses on painless piano playing, a subject about which I am passionate. I hope you find it of interest. You can read the first article in this series by clicking here, and the second by clicking here.
The previous two articles on this subject explained the importance of optimal movement at the keyboard. Using very simple exercises, I illustrated how I teach students to relax their upper bodies whilst they play. It’s too easy for our pupils to practice their pieces without realising how much tension they carry in their hands, arms and wrists, irrespective of their age; generally, the older and more advanced the student, the more obvious the issue. Spotting tension is relatively easy, and as teachers we become accustomed to observing how our students move as they play. But once tension has been highlighted and students are made aware of it, we must find various methods to alleviate restricting tautness before conditions such as tendonitis and repetitive strain injury manifest.
Painless Piano Playing Part 1 & 2 demonstrated simple exercises; in Part 1 the exercises were to be done away from the piano, and worked at regularly with a focus on how relaxed the student ‘feels’ whilst doing them. In particular, we looked at keeping shoulders, arms, wrists and hands loose and relaxed. In Part 2, we examined the beneficial use of moving the wrist in an exaggerated circular movement, often known as wrist circles or wrist rotations, which, if practised correctly, can be a very helpful method of releasing the tension that can exist when playing from note to note; students do have a tendency to ‘lock’ when playing a passage, especially rapid passage work. In particular, they forget to ‘release’ their hands and wrists, and sometimes, their arms, too. Therefore, we must find appropriate places for them to release tension during practice and performance.
This article continues to encourage the development of flexibility. Recapping a little, Ex. 1 was the final exercise in Painless Piano Playing Part 2:
Ex. 1

This very simple five-finger exercise can be a useful vehicle for our pupils to ‘release’ their hands and wrists after they play, that is, between each note. As we are aware, tension is required to play a note, but after it has been played, we can’t do anything to change the sound on the piano (unlike a violin), so therefore we should ideally release the hand and wrist immediately.
Students can be encouraged to play and hold the first note (middle C) with their thumb, and as they do so, they can drop the hand, wrist and arm (and shoulder!) in order to experience the feeling of ‘release’ in their muscles and tendons, whilst still holding onto the C, all before moving on to play the next note (D). The wrist will often flop down below the level of the keyboard here, and again, I reiterate that this is NOT a position to play the piano, but merely one to learn the feeling of releasing tension; wrists should be aligned with the keyboard for good piano playing but be able to move freely when necessary. Flatter fingers are desired for this exercise. Once this has all been assimilated, which can take a few weeks, we move on to a subsequent exercise still employing the five-finger note pattern, but this time, using the previously mentioned wrist circles.
The wrist circles require a complete circular movement made by the wrist between notes; as the pupil goes to play the note, so the thumb (if playing C), strikes the note with a downward motion in the wrist, which will now be accompanied by some weight from the arm, to help produce a rich tone. As the key is struck by the thumb (or finger), the wrist, helped by a loose arm movement and a guiding elbow motion, will make a circular movement, lowering the thumb into the key, using a deep touch, and moving below the keyboard level, before rising up (in a circular movement) before forming the next circle for the following note (D). By this stage, I would ask students to play on their finger-tips using a hook-shaped finger fully engaging the first finger joint, which will be the basis for developing firmer fingers. This is especially important with regards the fourth and fifth finger which will need careful practice.
Moving on from playing very slowly, and working at ‘releasing’ the wrist and hands between notes, we now require our students to learn how to do this whilst playing faster passages. For those who have never worked at their piano playing in this manner, it may take a few weeks to get to this stage. That’s not to say that students can’t play any other repertoire – on the contrary, it can be a good idea to learn flexibility on all pieces being studied, and I frequently teach this technique on scales and arpeggios, too.
One of the most pressing issues to be fully understood is the ‘feeling’ of the release, this is what I spend most time working on with students; once they realise how they must feel as they play, especially after playing groups of notes or note patterns, they are well on the way to ascertaining and incorporating this flexible approach. A good starting point is to ask your pupil to clench their fist and then swiftly release it, in order to understand the concept. I also ask students to ‘drop’ the wrist and hand if tension is still present. A ‘dropping’ motion, as in dropping the hand, wrist and arm down by their side, encourages them to fully relax their upper body.
For the next exercise, let’s use the following study from 101 Daily Exercises (Op. 261) by Czerny (Ex. 2). It’s the first piece in the volume, but you could easily use any running passage taken from a repertoire piece:
Ex. 2
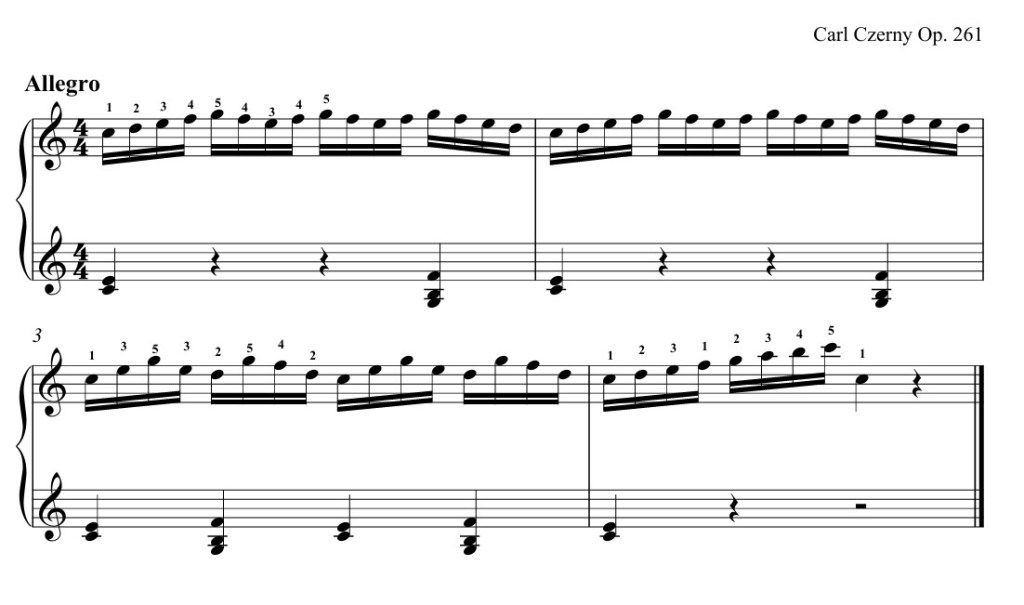
We will play it slowly at first, using the same technique employed for the five-finger pattern; something like this:
Ex. 3

Allow a ‘gap’ after each note, where the wrist can form wrist circles, and can release any tension after every note. Aim to play on the finger-tips and use a very deep touch when playing slowly (it’s also advisable to use the second study in Op. 261 too, for the left hand). The gap between notes can be as long as needed at first, then it will become shorter as the student learns how to release, until eventually they are playing the passage as written, that is, with the correct rhythm. If they have practised and ‘learned’ how to release sufficiently well, they will still be releasing their muscles and tendons during performance without noticeable gaps.
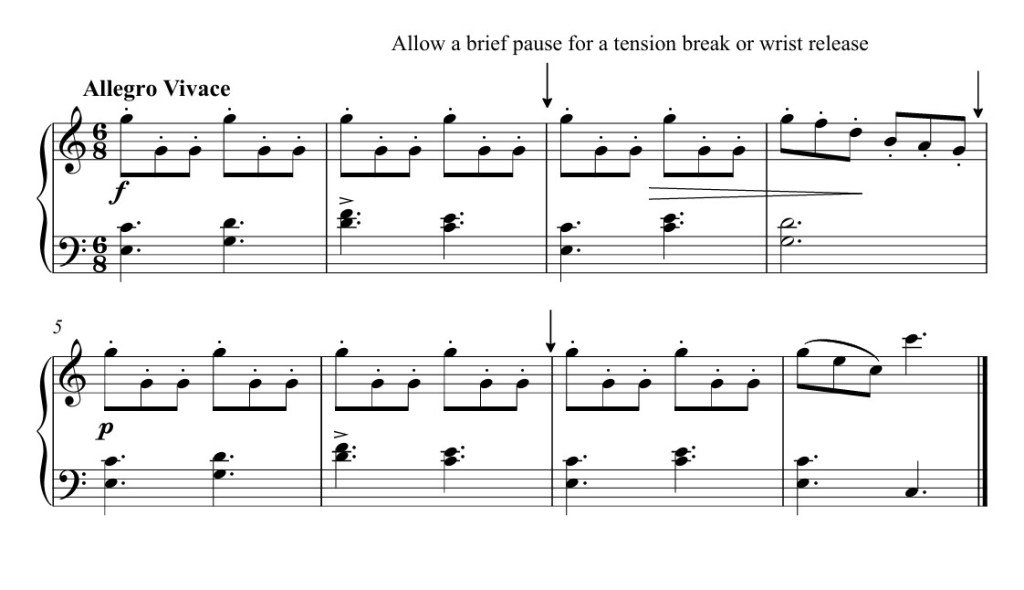
Now the challenge is to add speed. Find places in the passage to add a tension break. I have added a break after every group of semiquavers in the next example, Ex. 4:
Ex. 4

These breaks or gaps provide convenient places to rest. Longer gaps work well at first; ask students to allow a one or two second break after each crotchet beat to free themselves so that they are not ‘locking’ up. During this time, they should ideally be employing one wrist circle for every group of four semiquavers, whilst playing on the tips of their fingers, firmly into the key bed, ensuring each note is ‘even’ rhythmically. By playing each note evenly, they will mitigate the tendency to rush when playing notes using the fourth and fifth fingers. This will demand that these fingers play as firmly as the thumb and the second and third fingers, and will eventually contribute to developing the ‘Bridge’ position (where knuckles form a ‘bridge’ over the hand).
Once grasped, the ‘gaps’ or breaks after every crotchet beat can be shortened until they are unnoticeable in terms of the rhythmic pulse, but the wrist will still feel the sense of release because it has now become accustomed to small release breaks at certain points. By this point semiquavers should be completely even rhythmically, and the wrist will utilise a very quick circular movement in the place where the ‘gaps’ or tension breaks once were.
The final stage is to gradually increase the tempo and lighten the touch. As speed is added, more finger control will be necessary, so the pupil must have understood each stage thoroughly. Eventually, fingers will feel considerably firmer and will be able to play rhythmically at speed all whilst regularly releasing any tension via swift wrist circles at various points in any score.
Now your student understands the concept of tension and release, they can apply it to all sorts of passagework, from rapid scalic playing, to double notes or octaves, finding places within particular figurations to break any tension that they might have. The following passage hails from La Chasse, No. 9 from 25 Easy and Progressive Studies Op. 100 by Burgmüller. Here, the downward octave movement can become tiring without finding appropriate tension – release points, such as those suggested by the downward arrow marking in Ex. 5:
Ex. 5
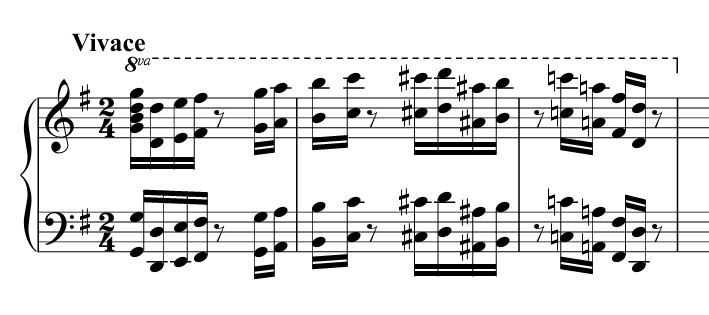
Similarly, the following group of octaves, which are taken from Study No. 49 Octaves – Bravura, from Art of Finger Dexterity Op. 740 by Czerny, could be split every four semiquavers during practice for tension breaks as shown in Ex. 7. Ex. 6 is the original version:
Ex. 6

Ex. 7
Such movement might seem a daunting challenge for students, but if worked at regularly and in small increments, a reliable technique will be formed and the upper body will feel comfortable and relaxed whilst playing at speed, and fingers will gradually feel firmer and have greater control.
You can read the original article by clicking on the link below: